Selecting Recently Modified Files in Dreamweaver

on Thursday, April 11, 2013

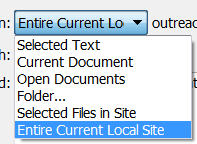
This command is a real time-saver.  Let's say you've been working on your website for the past two days and you are finally ready to upload your changes to the server, but you've worked on so many pages you don't want to go through the entire site and pick the ones to upload.  You can have Dreamweaver do it for you.

First, expand the File pane using the Expand icon, shown at left (you should always expand the File pane before uploading to the server.).

Next, go to the Edit menu and choose Select Recently Modified.  The dialogue box gives you three useful options, shown below.  You can select any files you've created or modified in a specified number of days (the screenshot shows 2 days).  You can select files you've worked on in a specific date range.  Or, if you are using the Contribute option, you can select files worked on by a specific person.

Caveat!  Dreamweaver often will NOT select images or documents you've added recently, even if you are linking to them from your recently modified page.  You need to do that manually.  And ALWAYS check your links after you've published.


Using Custom Find and Replace in Dreamweaver

on Friday, November 16, 2012

Using the Find and Replace command in Dreamweaver, can save you lots of time, particularly if you are adding the same code and/or text in multiple pages, like keywords, or navigation panels.  What makes the command particularly useful is that you can customize the limits of the search.  I use this all the time. It's a real time-saver.

To start, go to the Edit menu, and choose the Find and Replace command.  The dialogue box below will appear.


The Find text box and the Replace text box are pretty self-explanatory. Where this really becomes useful is in using the Find In and Search pulldown menus at the upper left.


The Find In menu (see screenshot at left) allows you to find/replace in just one page, a selected set of pages, a selected folder, or an entire site.


The Search menu (see screenshot at right) allows you to find/replace either in the Text or in the Source Code, but in addition can find/replace inside Specific Tags only, and even, using Text (Advanced), to find/replace text only within specific tags (e.g. - a link, a header, a table).

By using these two pulldown menus wisely, you can save yourself hours of time.   
 

Flickr Slideshow

on Tuesday, February 28, 2012

Flickr Slideshow, at http://www.flickrslideshow.com/, makes it very easy to create a slideshow from your photoset at Flickr. You give them the URL of your photoset, the width and height of the slideshow, and the site returns the code you need to put the slideshow up at a website or blog (shown below).

The first step is to create a Flickr account. Go to http://www.flickr.com/, register for free, and upload your photos.

Next, go to Flickr Slideshow, at http://www.flickrslideshow.com/. Type in your photoset URL (generally http://www.flickr.com/photos/, followed by a long number specific to your account). Choose the size of your slideshow - the one below is 500 x 400 pixels. Click Create Slideshow, and then copy-and-paste the code the sir returns to you in your blog or webpage.


Created with flickr slideshow.

Winter-Spring 2012 Connect Sessions

on Thursday, January 12, 2012

Below is the schedule for Web Development Connect sessions in the first half of 2012. Notice the emphasis on two areas: Google tools (Analytics, Docs, Forms, etc.) and slightly more advanced Working With Websites techniques (tables, multimedia, calenders). Those just starting to work with the CSU Extension Webpage Template are highly encouraged to attend these Working With Websites sessions.

Also included is a session on Prezi, a browser-based, non-linear alternative to death by PowerPoint!

2012 Connect Sessions:

Jan 18: Google Analytics
Feb 1: Using tables for web design (Working With Websites 6)
Feb 15: Prezi (an excellent alternative to PowerPoint)
March 7: Embedding Google Calenders on a web page (Working With Websites 7)
March 21: Google Docs
April 4: Multimedia on the web (Working With Websites 8)
April 18: Google Forms

Previous Connect sessions can be found at: http://www.coopext.colostate.edu/comptrain/co.shtml.

Previous Connect sessions relating to Working With Websites and the CSU Extension Webpage Template can be found here: http://www.coopext.colostate.edu/comptrain/co.shtml#wor

Exporting Dreamweaver Site Definitions

on Friday, October 14, 2011

I recently switched computers, and needed to move all my websites and site definitions from one machine to the other. There are over twenty sets of usernames and passwords, which I was not looking forward to finding and re-imputting. To complicate matters, my websites would not be in the same place on my new machine.

Luckily, Dreamweaver has well-designed import and export tools. First step: on the old machine, bring up Dreamweaver, go to the Site menu and choose Manage Sites. Choose the sites you want to export in the left column (see below), then choose Export. To select multiple sites, use the Ctrl button. Dreamweaver will create a .ste file for every site you selected.

Copy the .ste files over to your new machine. Move your actual website files over to the new machine. Open Dreamweaver, choose Import, and browse to the .ste files (again, Ctrl will allow you to select multiple files). Dreamweaver will begin importing all the site definition information - including usernames and passwords, if you choose that option - into Dreamweaver.

Here's the best part: if your website folders and files are in a different spot on the new machine, as was the case with me, Dreamweaver will prompt you to browse to the new location to find both the root folder and the default images folder. Show Dreamweaver where the files and folders are, and that's it! All your websites are now defined on your new computer.

Adobe Reader Icons

on Friday, September 2, 2011


Adobe Acrobat PDFs are the best way to distribute documents via a website, as, unlike Word documents, the Adobe Reader is free and already in wide distribution. It is important, though, to provide the end-user with a link to the free Adobe Reader (at http://get.adobe.com/reader/).

It is also nice to give the end-user the Adobe icon to help them identify the link to the Adobe Reader. Adobe has a page with three sizes of icons your can right-click and download at http://www.adobe.com/misc/linking.html.

Also on the page is a very useful list of Adobe's legal requirements for using the icon. They are all common sense requirements, such as not to alter the icon, or use it for the purposes of distributing obscene or pornographic images. Read the entire list by clicking on the link above. Then, download the icon and use it on your webpages!

Fall 2011 Connect Schedule

on Friday, August 26, 2011

The Fall 2011 series of Connect sessions will deal with two subjects: Working With Websites and Creating Video Podcasts.

On the first Wednesday of every month the Working With Websites sessions will explore the basics of managing a website, and is strongly recommended to those learning to work with the CSU Extension webpage template. Each session will end with a troubleshooting segment, where we open up the session to solving specific web problems and answering questions.

Webpage Template sessions:

  • Sept 7: Defining the site in Dreamweaver; Root folders; Making and uploading simple changes
  • Oct 5: Adding content (paragraphs, headers, lists, blockquotes); Adding new pages
  • Nov 2: SSIs (Server Side Includes): How SSIs work; Manipulating SSIs
  • Dec 7: Creating an engaging home page (tables and multimedia)
On the third Wednesday of every month Joane Littlefield and Jeff Wood will hold a series of Connect sessions on Creating Video Podcasts. They will take you through the entire process of creating your own video, from creating your storyboards and recording your narration to editing your video and distributing the final product.

Creating Video Podcasts
  • Sept 21: First steps, best practices / Working with titles
  • Oct 19: How to shoot / Working with sound
  • Nov 16: All about editing
  • Dec 14: Distributing your video
All sessions start at 9 a.m. and will last about an hour. Mark your calenders now!

Sending Data From a Webpage Form Via Email

on Friday, June 10, 2011

Want to learn how to put a form onto a webpage so that the data is emailed to you after it is submitted by the end-user? Darrin Goodman (darrin.goodman@colostate.edu) has created a simple and easy to follow tutorial on how to do just that, at http://www.coopext.colostate.edu/cewebdev/formdata/.

Here are two screen shots from his tutorial. The first shows a sample form displayed on a webapge. The second shows an email sent to the webmaster, containing data from that form, as submitted by the end-user.

Thanks for the tutorial, Darrin!

Adding a Facebook "Like" Button

on Thursday, November 11, 2010

Want to dip your toes into the social media scene, and increase traffic to your website at the same time? You can add a Facebook "Like" button to your webpages, so that when the end-user clicks the "Like" button on your site, a story appears in the user's News Feed with a link back to your website. You don't even need a Facebook account! The "Like" button uses the end-user's account.

Here's how: go to the Facebook Developers page at http://developers.facebook.com/docs/reference/plugins/like. Choose the layout, the font, whether you want to use the verb "like" or "recommend." A preview appears to the right of the dialogue box (see illustration below). When you have it tweaked to your liking. click the "Get Code" button, and cut and paste the code onto your webpages. If you like this feature, add the code to the template page you use to create new pages. Then, by default, ALL your pages will have a "Like" button on them.

Center for Plain Language Awards

on Wednesday, May 5, 2010

The Center for Plain Language has given out two awards this week for public websites that clearly and cleanly present information to the public. They are the US Department of Health and Human Services' Quick Guide to Healthy Living and the website for the City of Gresham, Oregon.

Both websites are worth a look as good examples of how to present content. They identify their audience and are written clearly for those readers. They make information easy to find, understand, and use. They omit unnecessary information and avoid dense, cluttered text.

Equally valuable are the criteria the Center for Plain Language uses to bestow these awards. You can also find Guidelines for creating plain language materials at their site. These are excellent resources for making sure your audience can quickly and easily find and understand the information you are presenting.

Load Time Analyzer

on Thursday, April 29, 2010

Most of you are probably aware of the 25 second rule: your web pages should load within 25 seconds, using a 56k modem. The 1 Hit Load Time Analyzer (http://www.1-hit.com/all-in-one/tool.loading-time-checker.htm) will check your load time, and rate your site with a color coded report. The report breaks down the page by giving you file sized of each image, and the file size of your HTML. So, if your site comes in over 25 seconds, you'll have a list of files (usually images) that are taking the longest to load, and know where to start in improving your load time.

Two examples are below. The first is the CSU Extension Webpage template, clocking in at a respectable 14.7 seconds. The second is an Extension website, which will remain anonymous, that clocks in at a rather sluggish 32.3 seconds. One image on this site takes up 86% of the load time. Compressing this image alone could take the image down to under 25 seconds.

Fast site:


Slow site:

Importing Tabular Data Into Dreamweaver

on Wednesday, March 10, 2010

You can quickly import data from Excel directly into a web page in Dreamweaver using the Import Tabular Data command.

The first step is to save the Excel file as a tab delimited .txt file using the Save As Type pulldown menu(a screenshot is below).


Next, bring up your webpage in Dreamweaver. Go to the Insert menu, choose Table Objects, and then Import Tabular Data (shown below).


Browse to the file in the Dialogue box (shown below), define the size, in pixels, of your cell padding (space between cell wall and content), cell spacing (space between cells), and borders. That's it! Easy, huh?

Text Link Checker Tool

on Wednesday, February 3, 2010

Is your website in a bad neighborhood?

The Bad Neighborhood text link checker (http://www.bad-neighborhood.com/text-link-tool.htm) automatically scans the links on your website, and on the pages that your website is linking to, and flags possible problem areas. Cut-and-paste your URL into the box, and the site will examine the anchor text linking to the various pages, and check for parts of certain words within them, such as “adult”, “sex”, and “pharma” (among others). Obviously, not every site with those words is a suspect site, but the tool does help you ferret out potential problem areas.

Clarification of what the tool actually does is available at http://bad-neighborhood.blogsblogsblogs.com/2007/08/26/a-quick-clarification-on-the-bad-neighborhood-detector/

A partial screenshot of the results of my own site is shown below. Click to enlarge.

Colorblind Web Page Filter

on Wednesday, January 13, 2010

A web accessibility tool after my own heart! Color-blindness is an oft-neglected but important consideration when determining web accessibility. There is a tool at http://colorfilter.wickline.org/ that allows you to see your website as a colorblind person would see it. The sight can replicate lots of different forms of colorblindness, from the relatively common red/blue color-blindness (8% of males) to total color blindness, or monochromacy (well under 1% of the population).

Just cut and past your URL into the box, and choose the type of color blindness you'd like to replicate. Some screen shots of the Extension template with the colorblind filter applied are below.

Our website in full color:


Our website as it would look to someone with red/green color blindness:


Our website as it would look to someone with monochromacy:

Webpage Template Connect Sessions

on Wednesday, December 30, 2009

We'll be conducting twice monthly Connect sessions on working with the CSU Extension webpage template, starting on the second Wednesday in January, and continuing on the 1st and 3rd Wednesdays of every month.

We'll work with every aspect of the webpage template, from downloading the files and defining the site in Dreamweaver to publishing the site working with Google Analytics to see who is visiting your site, and why.

The complete schedule is below. Each session will start at 9 a.m., and run approximately an hour. Mark your calenders!

  • Jan. 13 – Walkthrough of template components; Walkthrough of Dreamweaver workspace

  • Jan. 20 – Directory structure, defining the site

  • Feb. 3 – Metatags; Adding text, images, links to the home page

  • Feb. 17 –Working with Server Side Includes (SSIs)

  • March 3 – Named anchors

  • March 17 – Micro-content (headers, links, lists, data definition lists, buttons, block quotes, boxes)

  • April 7 – Working with tables on the main page

  • April 21 – 2nd level page content

  • May 5 – Writing your own CSS

  • May 19 – Using Google Analytics
  • HTML 101 Tutorial

    on Tuesday, December 8, 2009

    Darrin Goodman has put together an excellent HTML 101 video that succinctly explains the basic structure of the HTML tags in a web page. It's a great introductory lesson if you are just learning about HTML and web design. Check it out!

    This video was created with free and open source software. The tools used: Ubuntu Linux, Firefox, Leafpad, and gtk-recordMyDesktop.


    Another excellent tutorial on HTML and CSS is available at http://www.youtube.com/watch?v=GwQMnpUsj8I. It shows you how to create a webpage from scratch using only a text editor.

    The 25 Second Rule

    on Tuesday, December 1, 2009

    It is easy, if you have a fast internet connection, to be lured into the assumption that the rest of the world has one as well. But a significant percentage of the people looking at your website are using dial-up connections, and you need to keep them in mind when designing your web pages. The 25 second rule is a good one to keep in mind: make sure your web pages can be downloaded within 25 seconds on a 56 kbps (kilobytes per second) modem.

    If you are using Dreamweaver, this is easy to check. Look in the lower right-hand corner of the document window (see below; click to enlarge) and you will see the download time of whatever page you have up in the window.


    To change the connection speed, and see how quickly your page loads at different speeds, use the pull dowbn arrow just to the left of the download time (see below; click to enlarge). Click Edit Sizes. from, there you will be able to choose from a variety of different connection speeds.


    Using Filters in Google Analytics

    on Tuesday, November 24, 2009

    If you use Google Analytics to monitor traffic to your website, it might be wise to exclude visits to the site by yourself and other site developers. You can do this easily, by adding a filter, so that certain IP addresses or domain names are not included in the metrics.

    Log in to Google Analytics and select the site you want to add the filter to. Click Edit, toward the right side of the screen (see below, click to enlarge).


    Go to the section Filters applied to profile and select +Add Filter (see below, click to enlarge).


    This will take you to the filter dialogue box. Choose whether you want to exclude traffic from a domain, an IP address, or traffic to certain subdirectories, and then enter the domain, address, or subdirectory. In the example below we've used an IP address. Click Save Changes and you are done (see below, click to enlarge).


    You can use the site What is My IP Address (http://whatismyipaddress.com/) to find your IP address.

    To see a Connect tutorial on setting up Google Analytics for your site, go to the Connect tutorial page on Google Analytics (http://connect.extension.iastate.edu/p28806841/)

    Online Dreamweaver and Photoshop Tutorials

    on Thursday, November 19, 2009

    Adobe has thousands of video tutorials up at Adobe TV (http://tv.adobe.com/channel/how-to/), in easy to digest five minute segments.

    These tutorials cover the latest versions (e.g. CS4, in most cases) of all the products Adobe offers: Dreamweaver, Photoshop, Flash, Acrobat, Illustrator, InDesign, Premeire, and lots more. Experience levels range from beginner to advanced. They are well thought out, and well produced.

    Embedded below is a tutorial pulled from their site on defining a site on Dreamweaver CS4, the first step in working with any site in Dreamweaver.


    Thanks to Darrin Goodman for the tip!

    Microcontent

    on Friday, November 6, 2009

    People read books. They scan websites.

    Keep this in mind when adding content to your own website, particularly your home page. Use short sentences, short paragraphs. Develop a clean, clear, simple writing style. Write like Hemmingway.

    An excellent strategy to draw people into your site is use micocontent. Microcontent refers to small bits bits of text, formatted so they can be easily scanned.

    Example include...

    Headlines:

    Links:

    Lists:

    Buttons (image links):

    Boxes:

    Blockquotes: