![]() You can use a table to place a photo and accompanying caption to a web page. Start by clicking the Table icon in the Insert panel (screenshot at left).
You can use a table to place a photo and accompanying caption to a web page. Start by clicking the Table icon in the Insert panel (screenshot at left).
Use the dialogue box (screenshot below) to create a table consisting of 2 rows, 1 column. Select the table width; the example is set at 50 percent of the containing element. Set border, padding and spacing in pixels. Click OK.

Click inside the top cell of the table. Click the Image icon in the Insert panel. Select the image you'd like to insert, click Okay, and give it Alt text (a succinct description of the image). Click inside the bottom cell. Type in your text. Give it a style from the format box screenshot below); Headings 4, 5 and 6 are generally best suited for captions.

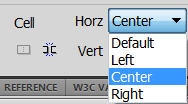
If you'd like to align the content (i.e. - the image or the text) of either individual cell, click inside the cell and use the Horizontal and Vertical cell alignment tools (screenshot at left).
 To get the accompanying text on the webpage to wrap around the table you'll need to align the table either left or right. Select the table by clicking the border. Choose Left or Right on the Table alignment tool (screenshot at left).
Before you publish the page, make sure to preview it in at least two different browsers, as tables appear differently in different browsers.